
Kitchen cabinet organization ideas can make cooking faster, cleanup easier, and shopping cheaper. When cabinets are set up well, you stop buying doubles, you find what you need, and the kitchen feels calmer.
This post shares real-life setups that work in busy family kitchens, small apartments, and renter-friendly homes. You will see pull-out drawers, labeled jars, stackable bins, lazy Susans, vertical dividers, spice risers, and deep drawer organizers.
Each section includes practical steps and a small “how to style it” idea so your cabinets look neat but still lived-in. You will also get a Pro Design Tip and a Budget Consideration for every setup.
Save the ideas you like, then start with one cabinet today. Small changes like shelf liner, clear pantry boxes, or a better snack zone can make the biggest difference.
1 Pull-Out Pantry Cabinets in a Busy Family Kitchen
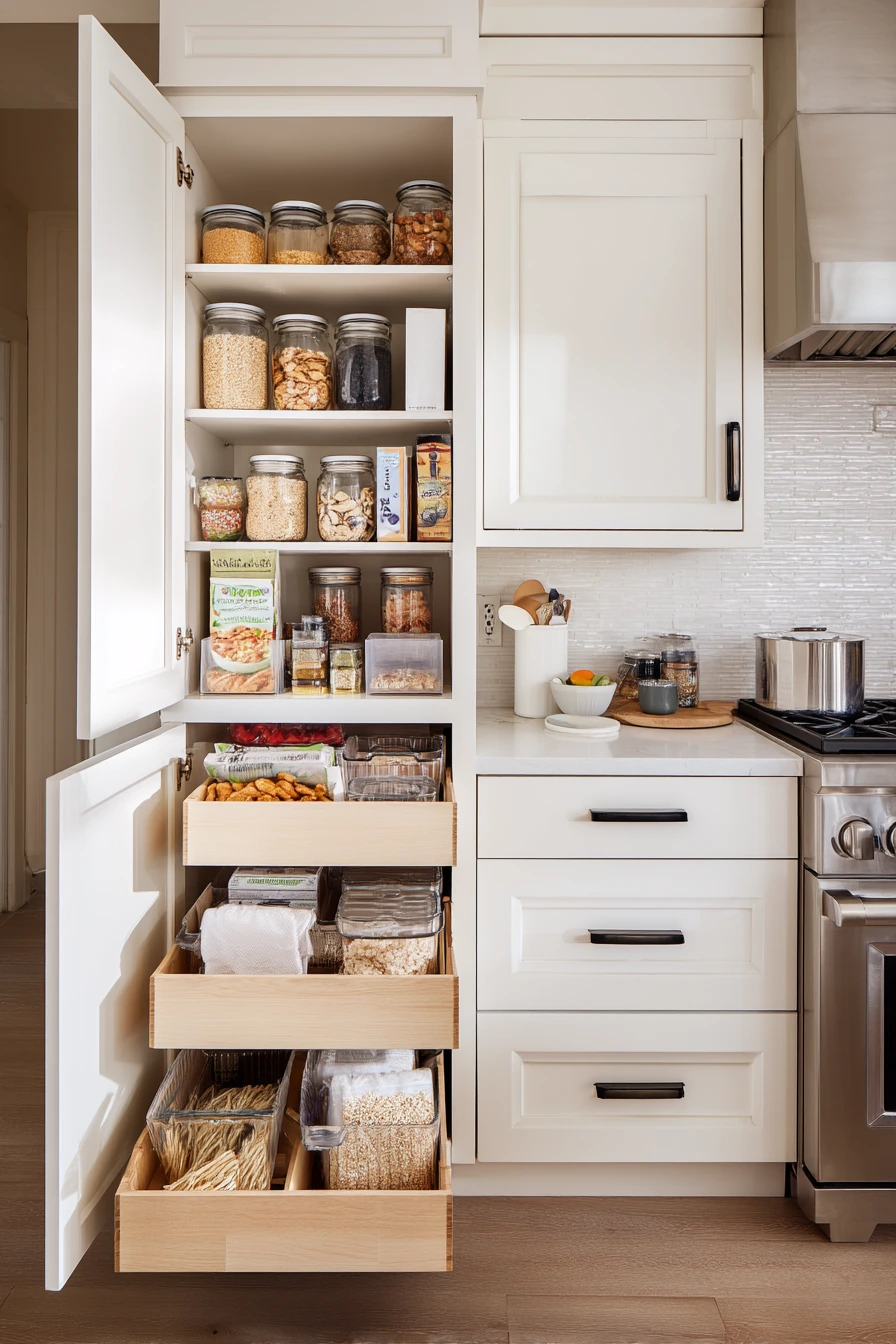

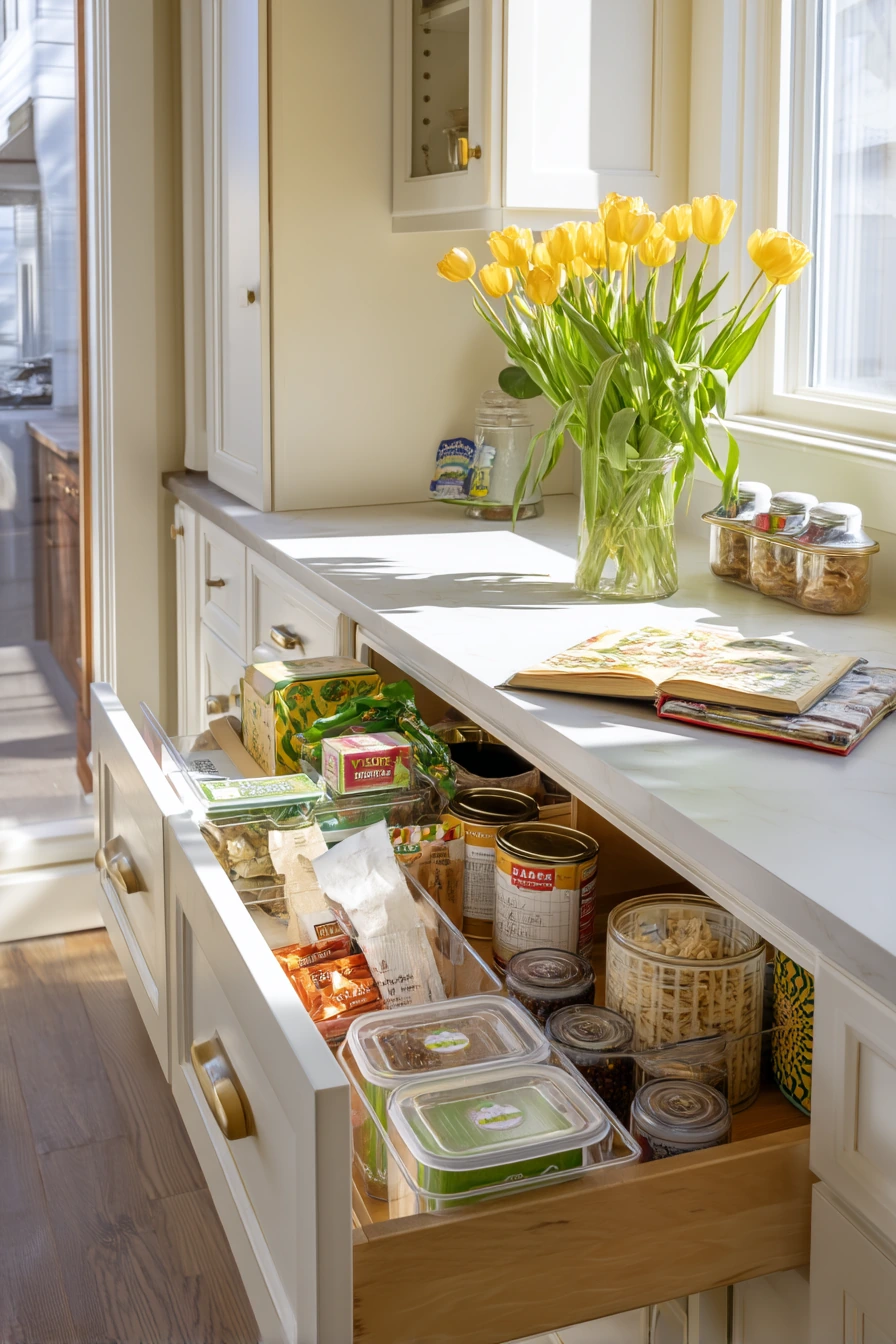
A lower pantry cabinet with pull-out drawers is one of the best kitchen cabinet organization ideas for a busy family of four. It keeps breakfast, snacks, and canned goods easy to reach, even for kids. When each drawer has a job, you do not need to dig through piles, and you can see what is running low.
Start by emptying the cabinet and sorting into simple groups: breakfast items, grab-and-go snacks, and pantry staples like beans and tomatoes. Use labeled glass jars for cereal, oats, and crackers, and place stackable bins for pouches and bars. Put heavier canned goods in the lowest drawer so it slides smoothly. If you have a corner cabinet nearby, add a lazy Susan for peanut butter, jam, and small bottles so nothing gets lost in the back.
Keep the counter realistic, not perfect. A kid’s cereal bowl on the counter is normal. A hand towel on the oven handle is fine. If you have one charging cable near a cookbook, corral it with a small tray so it looks planned. How to style it: match labels (same font and color), and use one bin style for a clean look, even if the food packaging is mixed.
- Label each drawer by use: “Breakfast,” “Snacks,” “Cans,” “Baking.”
- Use glass jars for items you refill often.
- Choose stackable bins so you can add or remove one as needs change.
- Put kid-friendly snacks on the middle drawer for easy access.
- Store backups up high or in the back so daily items stay in front.
Pro Design Tip: Use drawer labels on the cabinet frame, not the bin, so you can wash bins and move them without losing the system.
Budget Considerations: Pull-out drawers cost more; if you are saving money, use deep bins with handles and label the cabinet shelf edge instead.


2 Small Apartment Upper Cabinets with Vertical Storage


Small apartment kitchens need kitchen cabinet organization ideas that use height and the inside of cabinet doors. Upper cabinets can feel messy fast because items stack and topple. Vertical dividers and nesting setups keep things stable and easy to grab in a tight space.
Use vertical dividers for cutting boards, sheet pans, and cooling racks. Place nesting bowls together by size, and store lids upright so you can see them. Add a spice riser in one cabinet so labels face forward. For mugs, install mug hooks under the shelf to free up space for glasses. Clear pantry boxes are helpful up high because you can pull one down like a drawer. If you keep a tote bag on a stool or by the fridge, hang it on a hook inside a cabinet door so it is not always out.
How to style it: choose one clear bin size for snacks and one for baking extras. Keep the front row tidy and let the back be backups. If you have a mail stack by the fridge, give it a small tray so it does not creep into your cooking zone. A pothos plant nearby can soften the look; keep it out of splash areas so it stays healthy.
- Add vertical dividers for trays, boards, and pans.
- Use nesting bowls and keep lids upright in a narrow bin.
- Use a spice riser so you can see every jar.
- Install mug hooks under one shelf to open up space.
- Use clear pantry boxes as “grab bins” for small items.
Pro Design Tip: Group cabinets by task, not by item type, so the “coffee and mugs” cabinet is near the kettle and the “spices” cabinet is near the stove.
Budget Considerations: Use tension rods as simple dividers and repurpose shoe boxes as clear-ish pantry bins until you upgrade.


3 Budget-Friendly Tidy Cabinet Reset


Kitchen cabinet organization ideas on a budget work best when you focus on function first. You do not need matching containers to get a clean system. Labeled plastic bins, repurposed jars, and shelf liner can make a modest kitchen feel organized and easy to use.
Create simple zones. Pick one cabinet as a baking zone with flour, sugar, baking powder, and chocolate chips. Store mixing bowls and a hand mixer nearby if you have room. Use repurposed jars for items that spill, like rice, oats, or sprinkles. Add shelf liner to stop jars from sliding and to catch crumbs. For produce like onions, a wire basket adds airflow and keeps them from rolling around. In a drawer, group measuring cups and spoons on a hook rail or small hooks so you can grab a full set at once.
Keep the system realistic for real life. If a grocery receipt peeks out of a drawer, add a small “paper” spot so it has a home. Keep one water glass near the sink and store the rest in a cabinet so counters stay open. How to style it: use one label color and one simple word per bin, like “Snacks,” “Baking,” “Pasta.” It looks calmer even if the bins are not new.
- Use labeled plastic bins to group pantry categories.
- Save pasta sauce jars and use them for dry goods.
- Add shelf liner to reduce sliding and mess.
- Use a wire basket for onions or potatoes.
- Hang measuring cups on a small rail inside a cabinet door.
Pro Design Tip: Write labels by how you shop and cook, like “Lunchbox” or “Quick Dinner,” so you make fewer decisions at meal time.
Budget Considerations: Dollar-store bins and recycled jars work well; spend your money on one thing that fixes a daily problem, like a sturdy drawer organizer.


4 Deep Corner Cabinet Lazy Susan Solution
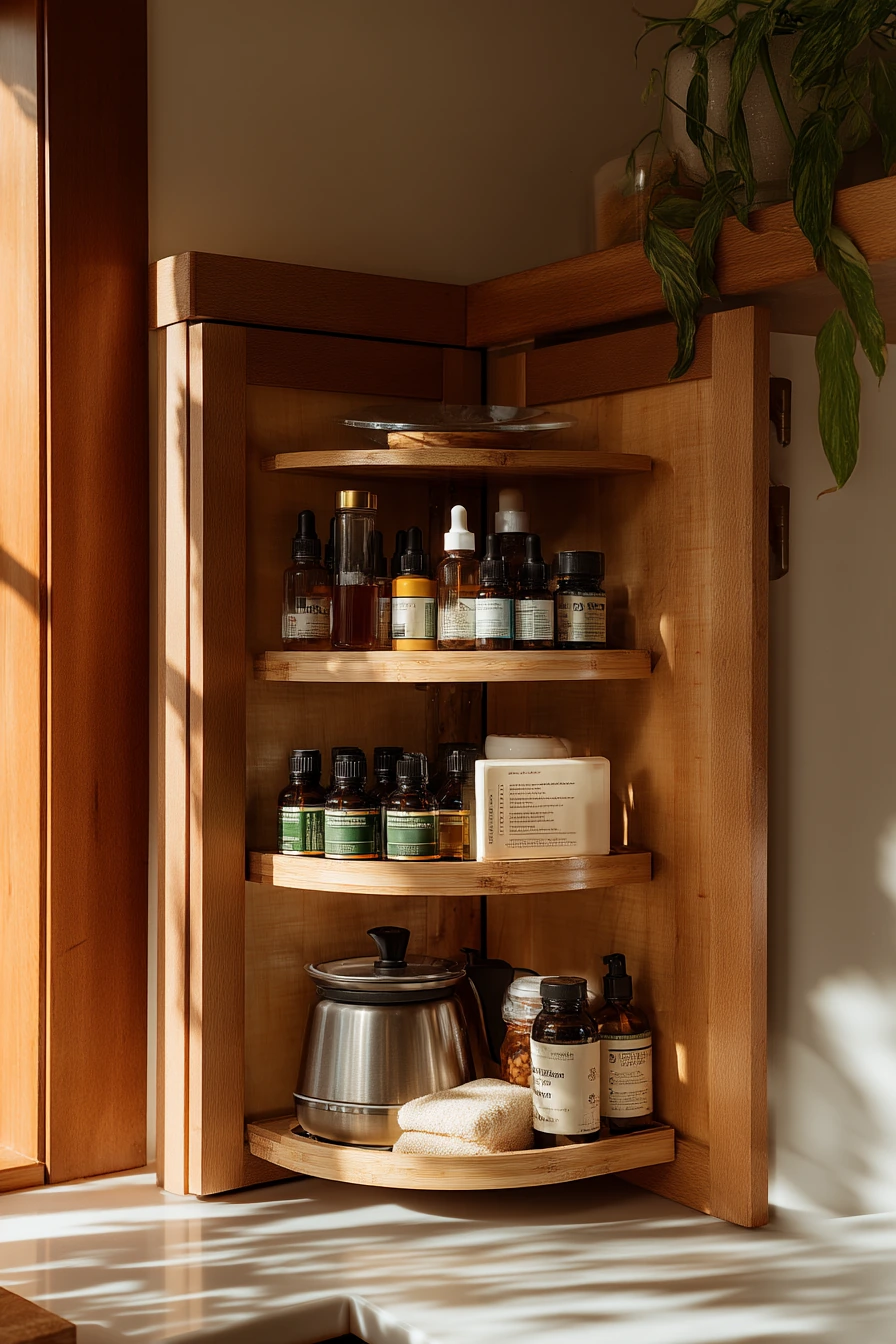

Deep corner cabinets are where good items disappear. A two-tier lazy Susan is one of the most effective kitchen cabinet organization ideas for corners because it turns wasted space into easy access storage. It works especially well for oils, vinegars, condiments, and small extract bottles that tip over in a pile.
Pull everything out and wipe the shelf. Then sort bottles by use: cooking oils, salad items, sauces, and baking extracts. Place the tallest items on the bottom tier and shorter bottles on top so you can see labels. Keep a small bin for packets, like gravy mix or taco seasoning, so they do not fall behind the turntable. If you like to cook tea or pour hot water often, store the tea kettle nearby so your “hot drinks” area stays together.
Use the cabinet door, too. Clip a recipe card to the inside of the door for your most-used dressing or marinade. Add a small command-style clip for it so you can swap it out. If a dish sponge and towel live nearby, keep them neat: fold a linen towel and hang it on a single hook inside the sink cabinet. How to style it: choose amber bottles or matching labels for oils if you decant, and keep the front of the lazy Susan mostly neutral so it looks calm when the door is open.
- Use a two-tier lazy Susan to fit more without stacking.
- Group bottles by task: cooking, salads, baking, condiments.
- Put tall bottles on the lower tier for better visibility.
- Add a small bin for packets and small jars.
- Clip a favorite recipe card to the cabinet door for quick reference.
Pro Design Tip: Leave one open “parking spot” on the lazy Susan so you have a place for the bottle you are using that week.
Budget Considerations: If a two-tier unit is pricey, start with a single lazy Susan and add a small riser behind it for shorter bottles.


5 Minimal Labels for a Calm Everyday Kitchen


A calm family kitchen does not mean you own less. It means your cabinets and drawers have simple homes for daily items. Minimal labels, matching canisters for flour and sugar, and clean drawer organizers can make kitchen cabinet organization ideas feel peaceful instead of strict.
Start with the cabinets you open every day. Store dinner plates together in one easy-to-reach spot and keep bowls stacked by size. Use matching canisters for baking basics you scoop often, like flour and sugar, so bags do not spill. For drawers, use cutlery trays and small dividers so utensils do not mix. Keep one cooking drawer for tools you use daily, like a spatula and whisk, and move rarely used gadgets to a higher cabinet.
Add a few lived-in touches so it still feels like home. A cookbook leaning against the backsplash can be part of the style if you keep the cover clean and the area around it clear. A kid’s watercolor on the fridge adds warmth. One mug drying beside the sink is normal; just keep extra mugs in a cabinet and do a quick reset at night. How to style it: choose canisters that match your cabinet tone, like soft white or clear glass, and keep labels small or skip them if the contents are obvious.
- Use matching canisters for flour and sugar to cut down on mess.
- Stack plates and bowls by size to save space.
- Use drawer organizers for cutlery and small tools.
- Keep one cookbook out and store the rest upright in a cabinet.
- Make a five-minute nightly reset to keep the calm look.
Pro Design Tip: Pick two “quiet” materials, like light wood and clear glass, and repeat them across cabinets so the whole kitchen feels consistent.
Budget Considerations: If matching canisters are costly, buy two for flour and sugar first, then add more later as you find deals.


6 DIY Shelf Risers and Tension Rods


DIY kitchen cabinet organization ideas are great when your cabinets are awkward, tall, or short on shelves. Shelf risers and tension rods can turn one messy stack into clear sections. You can store lids, trays, and cutting boards without buying custom cabinets.
Use shelf risers to create a second level for plates, bowls, or pantry items. This helps in cabinets where items disappear behind each other. For lids, place a tension rod inside the cabinet to hold them upright, or set two rods to create a slot for trays and cutting boards. If you keep a toolbox out while you work, you can finish the upgrade in one afternoon. For quick labeling, painter’s tape labels work well while you test the system. Once you like it, switch to a simple label maker or permanent marker.
For pantry bins, keep a “quick meals” bin with tomato soup cans, pasta, and jarred sauce. Place it at the front so busy nights are easier. Keep dish soap and cleaning supplies under the sink in a small caddy so the area stays tidy and safe. How to style it: use matching white shelf risers or clear ones, and keep labels straight and simple. A clean look makes even DIY solutions feel polished.
- Add shelf risers to create two levels in one cabinet.
- Use a tension rod to store lids upright and easy to grab.
- Store trays and boards vertically so they do not stack and slide.
- Test zones with painter’s tape labels before you commit.
- Create one “quick meals” bin for busy days.
Pro Design Tip: Measure the cabinet depth and buy risers that leave a small gap in front so you can slide items in without scraping your knuckles.
Budget Considerations: Tension rods and basic shelf risers are low cost; repurpose binder clips and small hooks before buying specialty lid racks.


7 Renter-Friendly Under-Shelf Baskets


Kitchen cabinet organization ideas for renters should be easy to install and easy to remove. Under-shelf baskets, adhesive hooks, and removable bins can add storage without drilling. The goal is to create zones like a snack drawer and a coffee station cabinet, even if the kitchen is small.
Use under-shelf baskets to hold napkins, sandwich bags, or tea bags. They slide on and off, so you can adjust as you learn what you use most. Add adhesive hooks inside cabinet doors for measuring spoons, oven mitts, or small towels. For plates and bowls, stack them in short piles so they feel stable. Create a snack drawer with bins so kids can pick items without pulling everything out. For a coffee station cabinet, keep mugs, coffee, filters, and pods together so mornings are smoother.
Keep the kitchen looking airy by reducing counter clutter. A reusable grocery bag on a chair is common; hang it on a hook inside a pantry door instead. If you like reading while you cook, a half-read novel on the counter can stay, but give it a small tray spot so it does not get splashed. How to style it: choose two bin colors max, like clear and white, and keep labels small so the space feels light.
- Use under-shelf baskets to add quick extra storage.
- Use adhesive hooks inside doors for small tools.
- Create a snack drawer with removable bins.
- Set up a coffee station cabinet with all supplies together.
- Move bags and papers off counters into a cabinet zone.
Pro Design Tip: Keep your most-used items between shoulder and hip height so you do not need a stool every day.
Budget Considerations: Skip pricey matching sets; start with a few under-shelf baskets and a pack of removable hooks, then build from there.


8 Busy Morning Coffee and Breakfast Cabinet Zone


A morning routine zone is one of the most helpful kitchen cabinet organization ideas for families. When mugs, espresso pods, oatmeal jars, and cereal containers live together, mornings run with less stress. A simple layout also helps kids learn where things go back.
Choose one cabinet and one drawer near the counter where you make coffee and breakfast. Store mugs on the lower shelf for easy reach. Keep espresso pods or coffee supplies in a small bin so you can pull them out as one unit. Use labeled jars for oatmeal toppings, like raisins or nuts, and keep cereal containers sealed to stay fresh. In a drawer, add inserts for spoons and small tools like a scoop. Keep a spoon rest and a small tray near the coffee area to catch drips and keep the counter clean.
Plan for school mornings, too. If a child’s lunchbox sits on the counter, give it a hook or a basket in a lower cabinet so it has a home. Keep one open notebook with the school schedule in a clean spot like a wall clip or a thin tray, not in the food area. How to style it: use clear jars with simple labels and line up containers by height. It looks neat, and it is easy to restock.
- Pick one cabinet for mugs and coffee supplies.
- Store espresso pods in a pull-out bin for quick access.
- Use jars for oatmeal and toppings to reduce open bags.
- Add drawer inserts for spoons and small tools.
- Create a lunchbox home in a lower cabinet or basket.
Pro Design Tip: Set up the cabinet so you can make coffee with one hand, meaning everything is within one step and nothing is stacked too high.
Budget Considerations: Reuse jars for oatmeal and buy one affordable drawer insert; you can add matching containers later if you want.


9 Deep Drawer Organization for Pots and Pans


Deep drawers can be the most efficient storage in the kitchen when they are organized well. Instead of stacking pots in a base cabinet, deep drawer kitchen cabinet organization ideas let you lift items straight up. This reduces noise, scratches, and the daily struggle of pulling out a heavy pile.
Start by matching each drawer to a purpose. Use a pot lid organizer so lids stand upright and do not slide. Nest pans by size, and place a thin protector or towel between if you want to prevent scuffs. Bamboo dividers help keep stacks from shifting when you open and close the drawer. For spices, use a flat spice tray in a shallow drawer so you can see labels at a glance. Store your cast iron skillet in its own spot because it is heavy and can damage other items if it slides.
Make it look tidy without being perfect. A dish towel draped over a drawer handle is fine, but keep extra towels in a small bin so they do not take over. If you keep a grocery list magnet on the fridge, review it when you put items away, so your drawers stay stocked and not overfilled. How to style it: choose one divider material, like bamboo or black metal, and repeat it in a few drawers so it looks planned when drawers are open.
- Use a lid organizer so lids store upright and visible.
- Nest pans by size and keep a clear “grab space.”
- Add bamboo dividers to stop shifting in deep drawers.
- Use a spice tray so labels face up.
- Give cast iron its own stable spot near the stove.
Pro Design Tip: Store the heaviest cookware closest to the stove and in the lowest drawer to reduce lifting and spills.
Budget Considerations: A basic lid rack plus simple dividers cost less than new cookware; even using rolled towels as separators can work short term.


10 Seasonal Reset with Clear Bins and Labels

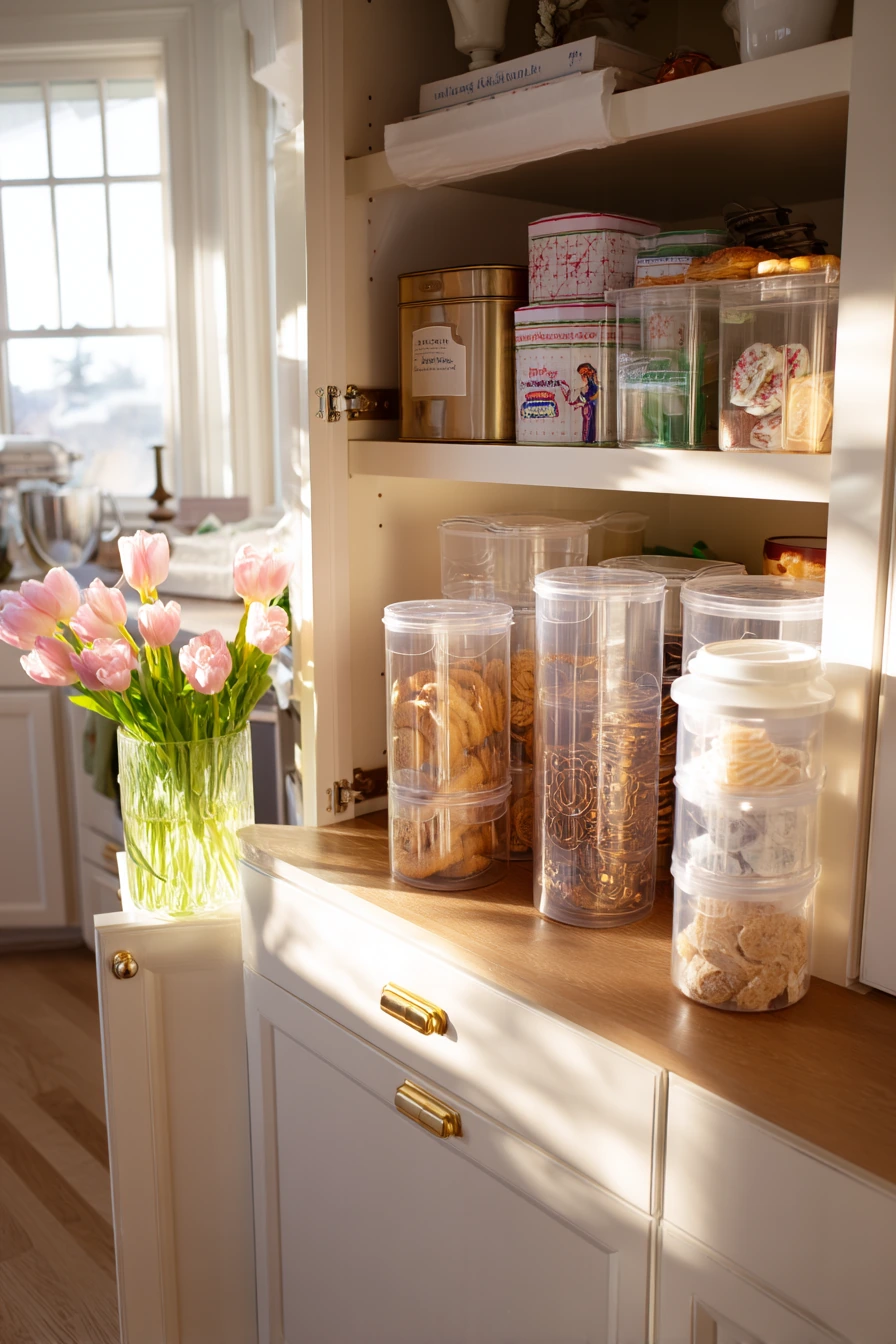
A seasonal reset is a smart time to refresh your kitchen cabinet organization ideas. You can clean out old items, restock basics, and set up bins that match what you cook right now. This is also when baking supplies, tea tins, soup cans, and holiday tools can be put in the right places instead of scattered.
Take everything out one cabinet at a time. Check dates and toss stale items. Wipe shelves, then place clear bins back in with simple categories: “Baking,” “Tea,” “Soups,” “Snacks.” Use a labeled box for holiday cookie cutters so they stay together and do not get crushed. Keep baking supplies like chocolate chips, sprinkles, and parchment in one bin so you can grab it when you bake. If you have an open cookbook on the counter while you restock, that is a good sign you are setting up the kitchen around real habits.
Make the reset feel nice, not stressful. Fresh tulips on the counter can make cleaning feel calmer, and it also reminds you to keep a small clear spot for daily life. If there is one stray apron, add a hook inside a pantry door so it stops landing on chairs. How to style it: line up clear bins like drawers, and keep labels consistent. Your shelves will look neat even when they are full.
- Do one cabinet at a time to avoid a big mess.
- Use clear bins for baking, tea, soup, and snacks.
- Store holiday cookie cutters in one labeled box.
- Keep daily items in front and backups in the back.
- Add one hook for aprons and towels to reduce clutter.
Pro Design Tip: After restocking, take a quick photo of each cabinet so you can reset it fast after busy weeks.
Budget Considerations: Reuse shipping boxes for seasonal items and add cheap labels; upgrade to matching clear bins only for categories you reach for often.

Good kitchen cabinet organization ideas are simple systems you can keep up with. Start with one problem area, like snacks, coffee, or pots and pans, then add small changes like bins, dividers, or a lazy Susan.
Keep your layout based on how you cook, not how a store display looks. When the setup fits your routine, your kitchen stays tidy with less effort.
FAQ
1. What is the fastest way to organize kitchen cabinets? Pick one cabinet, remove everything, wipe it down, then sort items into 3 to 5 groups. Put the most-used items in front and add one bin or divider to keep groups separate.
2. How do I organize cabinets in a small apartment kitchen? Use vertical dividers, under-shelf baskets, and clear pantry boxes you can pull down like drawers. Keep only daily items in the easiest-to-reach spots.
3. What are the best renter-friendly cabinet organizers? Removable bins, under-shelf baskets, adhesive hooks, and tension rods work well and can be taken down without damage.
4. How do I organize a deep corner cabinet? Use a lazy Susan, ideally a two-tier style, and group bottles by task. Leave one open spot so it is easy to put items back.
5. How should I organize deep drawers for pots and pans? Use a lid organizer, nest pans by size, and add dividers so stacks do not slide. Store heavy items low and near the stove.
6. How often should I do a pantry or cabinet reset? A quick tidy weekly helps, and a deeper reset every season works well. Do it before major holidays or when your cooking routine changes.